How to Make Hot Chocolate in a Coffee Urn: Your Foolproof Guide
Making hot chocolate in a coffee urn is an easy way to serve a large group of delicious hot cocoa.
Coffee urns are actually very versatile and great for heating up large batches of other warm drinks like hot chocolate. The key is to make sure your urn is completely clean first so the hot chocolate doesn’t take on any coffee flavors.
For best tasting hot chocolate from a coffee urn, be sure to use the right ratio of quality cocoa powder, sweetener, and dairy or nondairy milk when preparing the mixture.
By following some simple tips, learn to Make Hot Chocolate in a Coffee Urn: Your Go-To for Family, Office, and Festive Winter Gatherings
Key Takeaways
When making hot chocolate in a coffee urn, there are several key points to remember:
- Size Matters: The capacity of the coffee urn will dictate the quantity of hot chocolate you can make at one time. Larger urn sizes are perfect for serving groups at events or parties.
- Ingredient Prep: Essential components include chocolate or cocoa mix, milk or water, and sugar if desired. Some recipes suggest adding ingredients like chocolate chips for richness.
- The Process: A common method involves initially mixing the cocoa or chocolate with a small amount of hot water to create a smooth base, then gradually adding the rest of the water or milk while stirring consistently.
- Temperature Control: Coffee urns are generally designed to heat liquids to a certain point and keep them warm. Be mindful not to burn the chocolate by setting the temperature too high.
- Mixing Thoroughly: To avoid lumps and pockets of powder, continuous stirring is essential, especially during the initial mixing phase.
- Keep It Sweet: Taste your hot chocolate before serving, adjusting sweetness as needed. Some urns may also have settings for stirring or agitating the contents to keep the mixture uniform.
- Serving Savvy: For a crowd, ensure you have an adequate supply of cups and any desired additions like marshmallows or whipped cream conveniently located near the urn.
Remember, each coffee urn may have different specifications, so consult the user manual for temperature settings and capacity guidelines specific to your model.
Choosing the Right Coffee Urn
When selecting a coffee urn to make hot chocolate, one must consider the urn’s capacity and material to ensure it meets the demands of the event and maintains the desired temperature and flavor.
Capacity Considerations
The capacity of the coffee urn is vital for meeting the needs of your event. A standard size for many events is a 5-gallon urn, which can serve up to 80 cups of hot chocolate, making it suitable for medium to large gatherings. For smaller events, a coffee urn with a lesser capacity may be more appropriate to avoid waste.
- Small gatherings: 1 to 3 gallons
- Medium to large gatherings: 5 gallons and above
It’s important to match the urn’s capacity with the approximate number of guests to ensure everyone enjoys a delicious cup of hot chocolate without running out or having excessive leftovers.
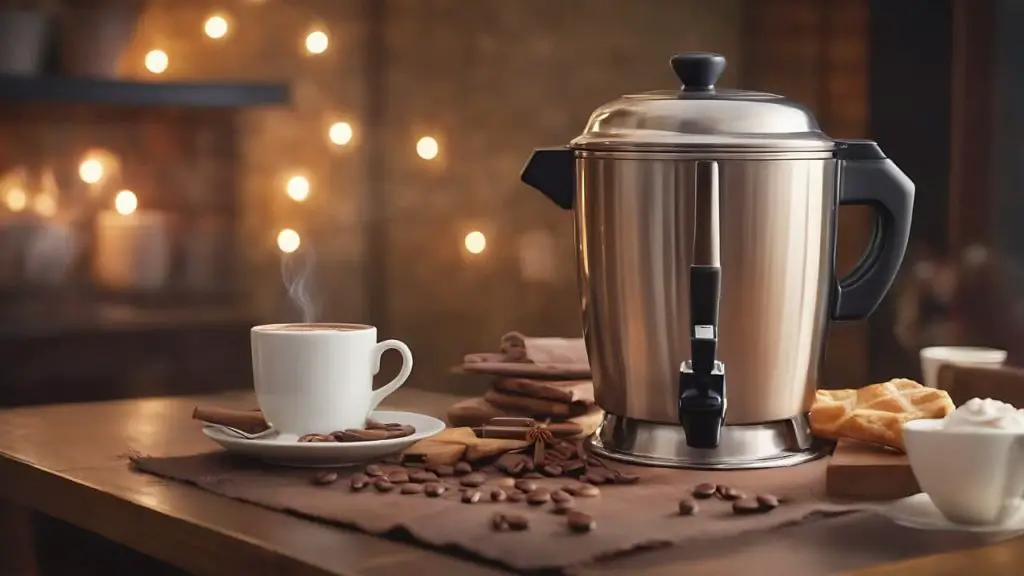
Material and Quality
Choosing a high-quality coffee urn made of stainless steel is recommended. Stainless steel is durable, ensures even distribution of heat, and is easy to clean. It also maintains the hot chocolate temperature effectively without altering the flavor.
- Stainless steel: Maintains heat, durable, and does not affect flavor.
- Other materials: May not retain heat as effectively and could impart off-flavors.
Whether you are hosting a party or events, a stainless steel hot water urn reliably provides hot chocolate to guests and maintains the desired warmth throughout the duration of the gathering.
Ingredients for the Perfect Hot Chocolate in Coffee Urn
Creating the perfect hot chocolate in a coffee urn begins with the selection of high-quality ingredients. A balance between rich chocolate flavor and the desired sweetness, complemented by a creamy texture, makes for an indulgent hot beverage.
Selecting Chocolate or Cocoa Powder
- Chocolate: For a decadently rich hot chocolate, one can choose either high-quality chocolate bars or chocolate chips. Dark chocolate with a cocoa content of 60-70% is ideal for depth of flavor, while milk chocolate can be used for a sweeter, creamier taste.
- Cocoa Powder: Unsweetened cocoa powder is a convenient alternative to melted chocolate. One should opt for Dutch-processed cocoa powder for a smoother taste, as it is treated with an alkali to neutralize its acids.
Choosing Your Dairy or Non-Dairy Milk
- Dairy: Whole milk is the traditional choice for hot chocolate, providing a rich and creamy texture. For an even richer drink, a combination of milk and cream can be used.
- Non-Dairy: Those preferring plant-based varieties can use almond milk, soy milk, or other non-dairy alternatives. These options are lighter and may alter the flavor profile slightly, with almond milk adding a subtle nutty taste.
Additional Flavor Enhancers
To elevate the complexity and richness of hot chocolate, one can incorporate additional flavorings:
- Sweeteners: Adjust the sweetness with sugar, be it white, brown, or a sugar substitute. The amount can vary depending on the sweetness of the chocolate used.
- Flavorings: Pure vanilla extract adds warmth and enhances the chocolate’s flavor. Spices such as cinnamon or nutmeg can introduce a seasonal twist.
Toppings: For an enticing presentation and added texture, one can garnish the hot chocolate with marshmallows or chocolate shavings before serving.
Preparing the Coffee Urn for Hot Chocolate
Properly preparing the urn is essential for crafting a delicious hot chocolate that serves multiple people. This process ensures the hot chocolate will be heated evenly and that flavors from previous uses do not interfere.
Cleaning
Before using a coffee urn for hot chocolate, one must clean the urn thoroughly to remove any coffee residue or lingering flavors.
- Fill the urn with warm water and add a small amount of dish soap.
- Use a non-abrasive sponge to scrub the inside, including the spigot area, to ensure any build-up is removed.
- Rinse the urn several times with clean water to eliminate all soap residues.
Preheating
For optimal results, preheating the coffee urn is recommended before adding the hot chocolate mixture.
- Fill the urn with hot water from the tap.
- Turn on the urn to allow the water to heat for a few minutes.
- Carefully drain the water once the urn is pre-heated, ensuring it’s ready for use.
Mixing the Hot Chocolate
In making hot chocolate in a coffee urn, one must focus on achieving a smooth mixture with the correct temperature to ensure a rich and satisfying beverage.
Achieving the Right Consistency
The key to a delightful hot chocolate is consistency. The process involves combining a specific ratio of cocoa powder to hot milk or water to prevent a lumpy or uneven texture.
A recommended ratio is 1 part cocoa to 2 parts liquid, but this can vary depending on the desired richness.
- Begin by sifting your cocoa powder to remove any clumps.
- Slowly add the hot milk or water, stirring constantly.
- Continue to stir until the mixture becomes uniformly smooth.
- If using a mix or premade hot chocolate powder, ensure it’s thoroughly blended with no visible powder.
Temperature and Heat Management
Maintaining the correct temperature is crucial for the perfect cup of hot chocolate. The beverage should be warm, not boiling, to avoid scalding the milk or burning the cocoa, which can impart a bitter taste.
- Preheat the coffee urn before adding the hot chocolate mixture to avoid a rapid temperature drop.
- Set the urn to a low to medium setting to keep the beverage warm without overheating.
- Regularly check the temperature, ensuring it remains around 160-180°F (71-82°C).
- Stir occasionally to distribute the heat and maintain uniform warmth throughout the urn.

Serving and Garnishing
When serving hot chocolate from a coffee urn, the focus should be on a smooth dispensing process and providing a range of garnishes to enhance the flavor and presentation of the drink.
Utilizing the Spigot for Dispensing
The coffee urn’s spigot ensures an efficient and mess-free way to serve hot chocolate. To use, simply place the cup under the spigot and release the handle gently to control the flow. For larger gatherings, it may be beneficial to have a ladle on hand to assist any guest that requires help or if the spigot becomes temporarily clogged with chocolate mix.
Toppings and Extras
Toppings enhance both the flavor and aesthetic appeal of hot chocolate. Offer a variety of options such as:
- Marshmallows: Provide a bowl of marshmallows next to the urn for a classic addition.
- Whipped Cream: Have canned whipped cream or a chilled bowl with a spoon for dolloping.
- Chocolate Powder or Cinnamon: Place shakers filled with chocolate powder and cinnamon for guests to dust onto their drink.
- Toppings Table: A dedicated space next to the coffee urn allows guests to add their desired extras, turning a simple cup of hot chocolate into a personalized treat.
By ensuring that the hot chocolate is easy to serve and customizable with a variety of toppings, hosts can cater to the preferences of all guests, making for a warm and enjoyable beverage experience.
Safety and Maintenance Tips
Making hot chocolate in a coffee urn can be a convenient way to serve a large group, but it is important to handle the device safely and maintain it properly to ensure longevity and prevent accidents.
Handling a Hot Coffee Urn
When using a coffee urn for hot chocolate, it’s crucial to handle the urn with care, as the exterior can become very hot.
Always use oven mitts or towels when touching the urn during and after heating to protect from burns. Ensure that the urn is placed on a stable, heat-resistant surface away from any flammable materials.
Never move the urn while it’s hot; wait for it to cool down before transferring it to prevent spills and potential injuries.
Post-Use Cleaning the Coffee Urn
After serving hot chocolate, cleaning the coffee urn is essential to prevent buildup and maintain sanitary conditions. Here is a step-by-step cleaning process:
- Unplug the urn: Allow the urn to cool completely before cleaning.
- Disassemble: Remove the lid and the brewing basket. If your urn uses a steel rod to heat, ensure it’s cool before handling.
- Rinse: Rinse the urn with hot water to remove any remaining chocolate residue.
- Clean: Wash the inside with a non-abrasive sponge and a mild detergent. For stubborn stains, fill the urn with hot water and add a cup of vinegar, letting it sit for an hour before rinsing.
- Sanitize: To sanitize, one may use a diluted bleach solution (1 tablespoon of bleach per gallon of water) and rinse thoroughly with water afterward.
- Dry: Dry all components with a clean towel or let them air-dry.
By following these safety and maintenance guidelines, one can enjoy the convenience of serving hot chocolate in a coffee urn while ensuring the longevity and cleanliness of the appliance.
Creative Hot Chocolate Recipes for Coffee Urns: Catering to Every Event
Offering hot chocolate at events is an indulgent treat that can be customized to suit a variety of tastes and dietary needs.
Here, you’ll discover how to accommodate guests who prefer dairy-free options as well as those looking for an upscale hot chocolate experience for special occasions.
Dairy-Free and Vegan Alternatives
When catering to guests with dietary restrictions or preferences, one can substitute non-dairy milk, such as almond, soy, or oat milk, which provides a creamy base suitable for vegan and lactose-intolerant individuals.

To enhance the flavor, vanilla or peppermint extract can be added to create a holiday-inspired beverage, perfect for a holiday party or a school gathering. Here’s a simple guide to creating dairy-free hot chocolate in a coffee urn:
- Ingredients:
- Your choice of non-dairy milk
- Cocoa powder
- Sweetener of choice
- Vanilla or peppermint extract for flavoring
- Instructions:
- Combine cocoa powder, sweetener, and a pinch of salt in a pot over medium heat.
- Gradually whisk in non-dairy milk until smooth and fully combined.
- Stir in vanilla or peppermint extract.
- Transfer mixture to a coffee urn to keep warm and serve to guests.
Deluxe Hot Chocolate for Special Occasions
For a decadent variation, consider enriching the hot chocolate with a touch of luxury. This can be achieved by incorporating fine dark chocolate pieces and flavored syrups, such as caramel, into the base recipe. Create a sumptuous drink that exudes sophistication for a special event.
- Ingredients:
- Whole milk or a mix of milk and heavy cream
- Quality cocoa powder
- Dark chocolate pieces
- Sweetener of choice
- Optional flavored syrups like caramel
- Instructions:
- Combine cocoa powder, sweetener, and dark chocolate in a saucepan over medium heat.
- Stir until chocolate melts and the mixture is smooth.
- Add milk or a mix of milk and heavy cream; continue to heat until hot.
- Stir in a splash of caramel syrup, if desired.
- Carefully pour the rich hot chocolate into the coffee urn for serving.
These variations can cater to the preferences of all guests, ensuring that your hot chocolate offering is inclusive and memorable.
Best Practices for Large Batches
When preparing hot chocolate for a group, precision in quantity and methods to retain warmth are essential.
Calculating Quantities for Guests
The first step in serving hot chocolate at an event is determining the amount required. To calculate the quantity needed, one must consider the number of servings per guest.
Typically, one carafe holds about 12 cups. For a large batch to serve 50 guests, at least 5 carafes should be prepared.
- 30 minute guideline: Prepare the first batch to be ready 30 minutes before guests arrive.
- Per serving: Estimate 8 ounces as a standard serving size.
Keeping Hot Chocolate Warm Throughout the Event
Ensuring that the hot chocolate remains at an optimal temperature throughout the event is important for guest satisfaction.
- Preheat the urn: Fill the coffee urn with hot water, let it stand for a few minutes, then empty it before adding the hot chocolate. This will help keep the drink warm for a longer period.
- Temperature maintenance: Most coffee urns have a built-in feature to keep the beverage warm. Monitor that the temperature is consistent but not high enough to cause the hot chocolate to burn or develop a skin.
Quick Guide on Using Other Chocolate Treats
When making hot chocolate in a coffee urn, one has the flexibility to incorporate various chocolate treats to enhance the flavor.
Utilizing hot cocoa mix is the most straightforward option. For a richer taste, chocolate chips can be an excellent addition. One can add them directly into the mix, ensuring they melt evenly.
Nesquik, a popular chocolate powder, can also be used as a sweet and convenient alternative. When using chocolate chips or Nesquik, follow these guidelines:
- Mix Ratios:
- For hot cocoa mix, adhere to the package instructions, scaling up proportionally to match the urn’s capacity.
- With chocolate chips, start with a half cup per gallon of liquid and adjust to taste.
- For Nesquik, use approximately one cup per gallon of liquid, or as per taste preference.
- Melting Point:
- Make sure the liquid is hot enough to melt the chocolate chips but not boiling, to avoid scorching.
- Stirring:
- Regular stirring is required to ensure the chocolate chips or powder dissolve properly, preventing sediment at the bottom of the urn.
- Consistency:
- Monitor the consistency and add more liquid or chocolate to achieve the desired richness. Chocolate chips will thicken the beverage more than powdered mixes.
- Taste Test: Before serving, taste the hot chocolate and adjust with more chocolate treats or liquid as needed for flavor and texture.
Remember, when experimenting with these treats, measurements can be adjusted for sweetness and intensity of chocolate flavor according to one’s preference.
It’s essential to stir frequently to blend the ingredients smoothly and to prevent any chocolate from sticking to the bottom or sides of the urn.
FAQs
Can I use regular coffee urns for hot chocolate?
This depends on the urn type. Some urns are designed for coffee brewing and may not be suitable for milk or chocolate, as high temperatures can scorch the mixture. Check your urn’s manual or manufacturer guidelines.
What’s the best ratio of water to chocolate for a good-sized urn?
This varies depending on your desired richness and the type of chocolate used. Start with a 2:1 water-to-cocoa ratio and adjust based on taste. Consider using less water for thicker hot chocolate.
Is it possible to use milk instead of water when making hot chocolate in a coffee urn, and what precautions should be taken?
Yes, milk can be used for a creamier hot chocolate. However, one must be attentive to stir the mixture occasionally and maintain a lower temperature to prevent scalding the milk or causing curds to form, which can be challenging to clean and might damage the urn.
Do I need to preheat the urn before adding ingredients?
Preheating helps ensure even heating and prevents the chocolate from settling at the bottom. Most urns have a “keep warm” setting that’s perfect for preheating.
What kind of chocolate works best in an urn?
You can use baking chocolate, cocoa powder, or even melted chocolate chips. Baking chocolate offers a deeper flavor, while cocoa powder provides a lighter texture. Experiment to find your favorite!


