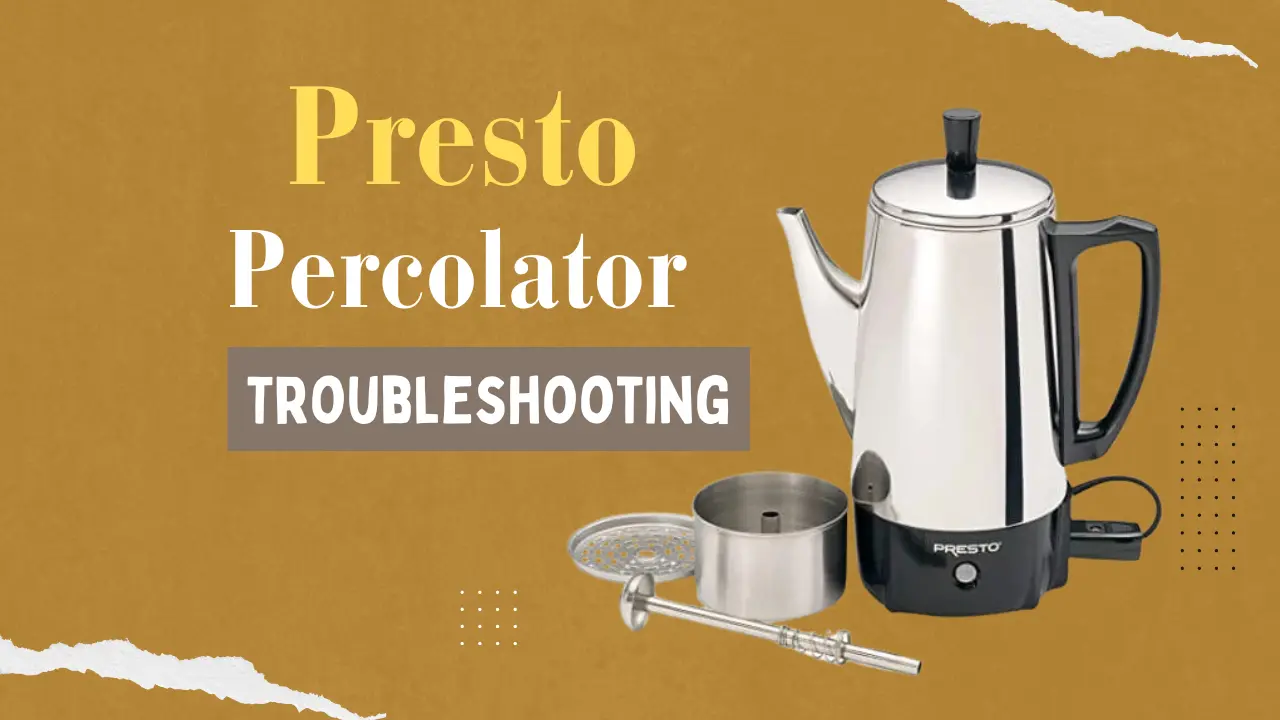
Presto Percolator Troubleshooting Guide: How to Solve Any Issue Like a Barista
The Presto percolator is popular with coffee enthusiasts for its rich, robust flavor. However, like any coffee maker, it can experience common issues that affect performance.
By understanding basic troubleshooting techniques for electrical problems, water flow complications, and component malfunctions, you can save time and avoid replacing your Presto altogether.
This guide will equip you with the key knowledge to quickly identify and resolve most presto percolator troubleshooting issues you may encounter.
Key Takeaways
- Perform regular maintenance like descaling and cleaning to prevent most performance issues. This includes backflushing after each use.
- Inspect cords, plugs, and outlets first when troubleshooting power problems. Then check the heating element and thermostat if needed.
- Fix inconsistent coffee flavor by descaling regularly and checking for damaged gaskets or clogged tubes.
- Be attentive to signals like indicator lights, perking sounds, temperature cues to catch issues early. Know what normal operation looks and sounds like.
- Refer to manufacturer guidance when problems persist after basic troubleshooting steps. Repairs like replacing the thermostat may require professional support.
Setting Up Your Presto Electirc Coffee Percolator
Before you enjoy your first cup of coffee from your new Presto Percolator, it’s essential to understand its components, properly assemble it, and perform initial cleaning. Adhering to these steps ensures optimal performance and longevity.
Understanding the Components
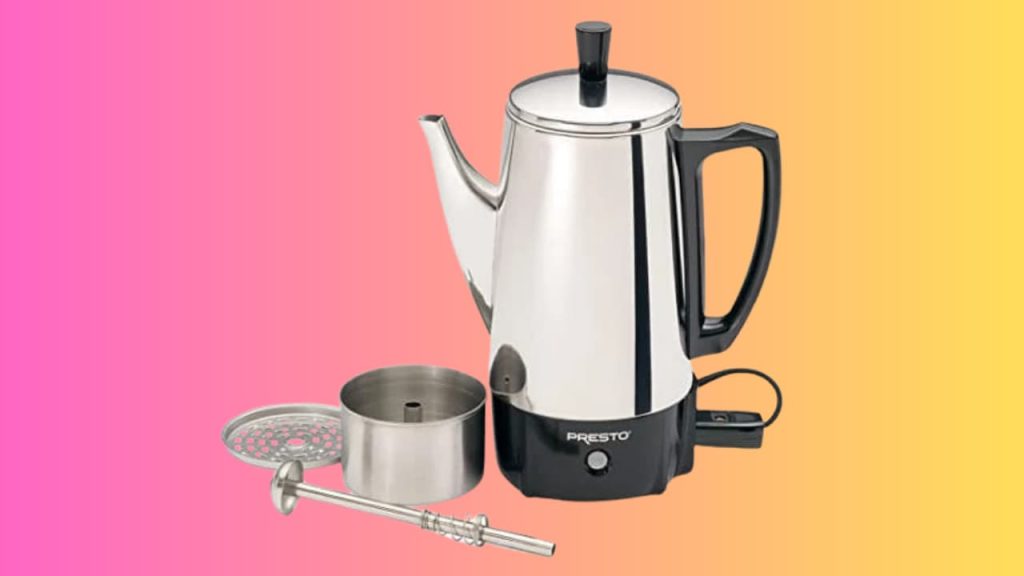
Your Presto Percolator comes with several key components that need to be familiarized with before use. First, check that the power cord is in good shape and that the plug is compatible with your home outlets.
The user manual or a downloadable PDF manual should list all the parts and provide valuable instructions on their assembly and use.
Step-by-Step Assembly Guide
1. Review the manual: Open your user manual to the assembly section. It’s your step-by-step guide to proper setup.
2. Connect the base: Ensure that the coffee maker’s base is placed on a flat surface near an outlet and connect the cord.
3. Insert the tube: Place the tube that carries water up into the coffee grounds. Ensure it’s seated properly.
4. Add the basket: The coffee basket should fit snugly over the tube. This is where you’ll add coffee grounds.
5. Secure the lid: Your percolator will have a lid that locks into place. Make sure it’s secure to prevent spills.
6. Plug in: Once assembled, plug the cord into your outlet, but only turn the percolator on when you’re ready to brew.
Initial Cleaning and Maintenance
Before brewing coffee, it’s essential to clean your Presto Percolator:
- Fill with water: Add water to the reservoir up to the max fill line indicated in your user manual.
- Run a cycle: Turn on the percolator to run a cycle with just water, without adding coffee.
- Dispose of water: After the cycle, carefully dispose of the hot water.
- Clean removable parts: Wash the basket, tube, and lid with mild soap and rinse well.
This process not only cleans your percolator but also familiarizes you with its operation, ensuring it’s ready for use when you are.
Basic Operation
Before you enjoy a flavorful cup of coffee from your Presto Percolator, it’s important to understand the basic steps: filling the reservoir, measuring the ratio of coffee to water, and starting the brew cycle. Each of these steps is crucial for the perfect brew.
Filling the Water Reservoir
To start, ensure the coffee maker is unplugged. Then, lift the lid and pour cold water into the reservoir.
Your Presto model likely has an indicator for the water level, so fill it accordingly, depending on how many cups you wish to make. Remember to use fresh water for the best-tasting coffee.
Measuring Coffee-to-Water Ratio
After the water is filled, it’s time to add your ground coffee. A general guideline is to use one tablespoon of coffee for every cup of water.
However, you can adjust this depending on how strong you like your coffee. Place the coffee into the basket and spread it evenly to ensure uniform extraction during the brew.
Starting the Brewing Cycle
Once your coffee maker is loaded, secure the lid and plug in the unit. Press the start button or switch it to the on position to start the brewing cycle. Your Presto Percolator will heat the water and begin percolating.
When the coffee is ready, a signal light will usually illuminate. Some models might shut off automatically or switch to a ‘keep warm’ setting, depending on your Percolator’s features. Always be present when the percolator is brewing and do not leave it unattended.
Presto Percolator Troubleshooting Common Issues
When your Presto percolator presents problems, efficiently addressing common issues can restore your coffee-making routine to normal.
This section guides you through the steps to troubleshoot no power situations, issues with heat, fluctuations in coffee temperature, and inconsistent coffee flavors.
Quick checklist of basic troubleshooting steps to try first when experiencing issues with your Presto percolator:
- Check power connection:
- Ensure percolator is plugged into functioning, grounded outlet
- Inspect power cord for damage
- Test outlet with another appliance
- Check for clogs:
- Inspect coffee basket and internal tubing for blockages
- Clean out any coffee grounds, mineral deposits
- Assess water flow:
- Ensure water reservoir is filled properly
- Check for kinks/obstructions in tubing
- Make sure lid is sealed tightly
- Evaluate heating function:
- Let percolator preheat adequately
- Listen for boiling/percolating sounds
- Feel exterior for warmth
- Reset percolator:
- Turn off and unplug machine
- Allow to cool completely
- Restart after 10-15 minutes
If issues persist after trying these basic steps, refer to the troubleshooting sections in this guide for next steps on resolving specific problems. Let the detailed breakdown of common issues serve as your roadmap.
Why Presto Percolator Won’t Start
If your Presto percolator won’t start, the problem could be associated with no power getting to the heating element.
First, ensure that the power cable is properly plugged into a functioning outlet. If there’s still no power, the issue might lie within a faulty cord or switch.
Guidance on how to replace a faulty switch can be found clearly detailed at Coffee Percolator Not Working: 8 Causes and What To Do.
Coffee Not Hot Enough
In cases where your coffee is not hot enough, this could indicate a malfunction with the thermostat or heating element.
A coffee percolator relies on a proper functioning heating element to heat the water to the optimal brewing temperature. For details on addressing thermostat issues, you can consult Repair A Broken Coffee Perc.
Inconsistent Coffee Flavors
Inconsistent coffee flavors can often be a byproduct of scale buildup, which can interfere with proper water flow and temperature. Regular cleaning is essential for maintaining the best flavor possible.
If your percolator needs descaling, which is a common issue, use a vinegar solution for a thorough clean.
Learn the right cleaning techniques at Your Coffee Percolator Troubleshooting Guide: 10 Fixes To Address …. It’s also advisable to check for any other flavor-affecting malfunctions, like damaged seals or a clogged tube.
Electrical Problems and Solutions
When your Presto Percolator is not operating correctly, it’s essential to approach electrical issues with caution. Proper diagnosis can prevent unnecessary replacements and ensure safe operation.
Identifying Cord and Plug Issues
Cord and plug malfunctions are common electrical problems that can prevent your percolator from working. First, inspect the cord for any signs of damage like fraying or cuts. Ensure the plug fits securely into the power source and that there is no evidence of burn marks or melting.
Using a Multimeter for Diagnosis
A multimeter is an invaluable tool for diagnosing electrical faults in your percolator. To check for continuity in the wires and components, set your multimeter to the ohm setting. A reading that fluctuates or shows no continuity suggests a need to replace faulty parts.
- Step 1: Turn off and unplug your percolator.
- Step 2: Place the multimeter probes on the cord’s plug prongs.
- Step 3: A stable reading indicates the cord is functioning; no reading suggests it’s time for a replacement.
When to Contact the Manufacturer
When you’ve assessed the percolator and the issue seems beyond basic cord and plug problems or multimeter diagnosis, it’s prudent to contact the manufacturer.
Electrical repairs on electrical appliances can be complex and may require professional attention. Always consult your percolator’s warranty before attempting a DIY fix or contacting the manufacturer for guidance.
How often should I clean my Presto percolator?
Keeping your Presto percolator in perfect working condition involves regular maintenance and cleaning. You’ll prevent common issues like clogs and mineral deposits, ensuring optimal brewing performance.
Regular Cleaning Schedule
Adopt a routine cleaning schedule to prevent the buildup of coffee oils and other debris. After each use, wash the coffee basket and pot in warm, soapy water.
Rinse thoroughly and dry to prevent corrosion or mildew. For the detachable parts, check if they are dishwasher-safe for added convenience.
Descaling with Vinegar
Over time, your Presto percolator may develop mineral deposits, especially if you have hard water. To descale, fill the reservoir with a mixture of water and white vinegar, using a one-to-one ratio.
Brew halfway, then switch off and let it sit for 15 minutes. Finish the cycle before flushing the system with two to three cycles of fresh water.
Addressing Clogged Elements
Should you find the water flow impeded, it’s possible that coffee grounds or scales have clogged the percolator’s elements.
Disassemble the parts to visually inspect for clogging and clear any obstructions with a brush. If necessary, you can use a commercial cleaning solution made for coffee makers to aid the cleaning process.
Regular descaling can prevent clogged elements before they interrupt your coffee routine.
Water Flow and Heating Issues
When your Presto percolator isn’t performing properly, issues with water flow and heating are common culprits. Ensuring clean water pathways and correct heating function is vital for the perfect brew.
Checking for Obstructions
To maintain a steady water flow, check for obstructions in the coffee percolator’s tube. This tube, often the center of water passage, can become blocked with coffee grounds or scale buildup.
Inspect the tube visually and clear any debris carefully. You may need a flexible brush designed for small diameter tubes.
Assessing the Heating Up Process
The heating up phase is crucial for your Presto percolator’s operation as it transforms water into steam to brew the coffee.
If your percolator isn’t heating properly, inspect the power cord and ensure it’s plugged in securely.
A faulty thermal fuse or malfunctioning thermostat can also prevent proper heating, which may require replacement parts from trusted sources such as Presto’s official support.
Troubleshooting Water Flow
Lastly, the water flow itself can be disrupted, leading to under-extracted coffee. It’s important to make sure that the percolator’s tube isn’t kinked and the lid is correctly placed to allow steam to circulate.
Regularly descaling with a suitable cleaner can prevent mineral deposit buildups, which might hinder water flow and affect brewing temperature and time.
Component Repairs
When dealing with a malfunctioning Presto percolator, it often comes down to faulty components. You may need to replace or service the thermostat, heating element, or inspect the tube and stem to restore function.
Replacing the Thermostat
If your Presto percolator isn’t reaching the correct temperature or is turning off prematurely, you might need to replace the thermostat. This is a critical part, as it regulates the temperature and ensures your coffee brews correctly.
Begin by unplugging the percolator and removing the base to access the thermostat. Carefully disconnect the old thermostat and install a new one, making sure it’s securely in place.
Servicing the Heating Element
A defective heating element can lead to your coffee not being hot enough or the percolator not working at all.
To service it, make sure the percolator is unplugged and cool. Access the element by removing any necessary coverings or parts, such as the bottom or side panel. Look for signs of wear or damage. If it’s defective, you’ll need to remove and replace the heating element.
Inspecting the Tube and Stem
The tube and stem are essential for directing water in your percolator. An obstruction or damage can cause brewing issues. You should regularly inspect these parts for any buildup that might need cleaning or for any indications that they need replacement.
To inspect, disassemble the parts connected to the tube and stem and assess for any damage or clogs that could be impeding water flow.
Lid, Seal, and Pressure Checks
When using your Presto percolator, ensuring the integrity of the lid seal and managing the pressure are crucial for its optimal performance. Regular maintenance of these components will help to prevent issues and extend the lifespan of your appliance.
Ensuring a Tight Lid Seal
Inspect your percolator’s lid gasket frequently for any signs of wear or damage. It’s essential to have a tight lid seal for proper operation. If you discover any cracks or brittleness, it’s time to replace the gasket.
Always make sure the lid is secured firmly before use to prevent steam from escaping, which could affect the brewing process.
Monitoring Pressure During Use
Keep a close watch on the pressure in your percolator during use. The right pressure is vital for preparing your coffee correctly. Use your senses; listen for the gentle hissing sound or look for a steady flow of coffee in the globe to indicate that the percolator is maintaining the correct pressure.
If the pressure seems too high or too low, reference your user’s manual for troubleshooting steps or consider a maintenance checkup.
Understanding Signals and Indicators
The proper interpretation of your Presto Percolator’s signals and indicators is crucial for both optimal operation and troubleshooting.
Your awareness of the signal light’s meaning and the significance of unusual sounds will keep your experience with the coffee maker smooth and enjoyable.
Reading the Signal Light
The signal light on your Presto Percolator acts as a primary indicator of the machine’s status.
When the light turns on, it signifies that your coffee is ready to serve. It is important to refer to the Presto 02811 Coffee Maker instructions to understand the specific timings and functions associated with this light.
Remember, the signal light is one of your primary senses when using the coffee maker and should not be overlooked.
Interpreting Unusual Noises
Unusual noises emanating from your Presto Percolator should be taken seriously as they could indicate potential issues. A humming or soft bubbling sound is normal during brewing; however, loud noises or pronounced changes in sound could suggest a problem.
The instruction manual for your model will have specific troubleshooting tips. Paying close attention to any deviations from typical sounds will help you maintain your coffeemaker effectively.
Best Practices for Coffee Percolation
To ensure you enjoy a robust and satisfying cup of coffee every time, mastering the percolation process is key. Paying attention to details will not only enhance the flavor but also prolong the life of your coffee percolator.
Achieving Optimal Extraction
- Grind Consistency: Use a medium-grind for your coffee beans, as too fine can lead to bitterness and too coarse can result in weak coffee.
- Water Temperature: Aim for boiling water between 195°F to 205°F to extract the full range of flavors without scalding the coffee.
- Percolation Time: The standard percolation time should be about 7-10 minutes for a 12-cup stainless steel coffee percolator. Prolonged exposure can cause over-extraction.
Avoiding Coffee Stains and Residues
- Regular Cleaning: Clean your percolator after each use to prevent coffee stains and buildup, ensuring it operates smoothly.
- Cleaning Agents: Diluted vinegar is effective for descaling; it removes residues without leaving harmful chemicals behind.
Selecting Quality Coffee Beans
- Bean Selection: Choose high-quality, fresh beans that have been properly stored to maximize flavor.
- Storage: Keep your coffee beans in a cool, dark place to preserve their natural oils and aromas. Avoiding excess air and moisture will also help in maintaining the beans’ quality.
FAQs
Why My percolator boils over constantly?
You might be using too much coffee grounds. Reduce the amount and ensure they’re coarsely ground.
The water level might be too high. Fill it just below the steam vent pipe.
The percolator stem might be clogged with mineral deposits. Clean it thoroughly with vinegar or a descaling solution.
The percolator lid might not be sealed properly. Ensure it’s securely fastened and not warped.
Why percolator coffee tastes bitter?
You’re likely over-percolating. Remove the percolator from heat once brewed and keep it warm on a low setting.
Your coffee grounds might be too fine. Use a coarser grind to prevent over-extraction of bitterness.
Try a different coffee brand or roast. Some naturally have a more bitter taste profile.
How do I descale my percolator?
Fill the pot with a mixture of equal parts water and white vinegar.
Bring the mixture to a boil and simmer for 15-20 minutes.
Turn off the heat and let it cool completely.
Empty the pot and rinse thoroughly with clean water.
What’s the best water-to-coffee ratio for my percolator?
This depends on your personal preference and desired coffee strength. A good starting point is 1 tablespoon of coarsely ground coffee for every 6 ounces of water. Adjust to taste from there.
What type of coffee should I use with my percolator?
A medium grind is recommended. Coarse or fine grinds may not extract properly in a percolator. Consider using a pre-ground coffee specifically labeled for percolators.
Can I use flavored coffee beans in my percolator?
Yes. However, remember that the flavors may intensify during the brewing process. Start with a smaller amount of flavored coffee than you would normally use and adjust to taste.

